Search This Blog

Wednesday, February 24, 2016

Film Noir Stage

Hello, this is my final project as Guest Designer for Gypsy Soul Laser Cuts this February. The array of exciting choices, at GSLCuts, set my imagination in thousands of directions. 


When I spied the stage I knew Film Noir was the theme.  I limited my color palette to a gray scale and dove in.
Please browse with me through the steps; I'll share some tips and provide the supply list at the end. Let's go...


Rather than paint the pieces and then assemble them, this time I glued the stage together first (except for the top curtain piece). Tacky glue worked great to hold the pieces in place as they dried. (E6000 was not as friendly to work with.)


I used some leftover spray paint to change the color. (A shade that looks like aluminum.) I placed the stage in a shallow cardboard box and sprayed in light, even, sweeps out-of-doors. Let it set for an hour for most of the fumes to dissipate.


The top curtain section was covered in black gesso.


I wanted the other leftover spray paint for the filmstrip. (This shade looks like chrome.) Then I taped off the curtain sections for stripes.


Again, I placed the stage in a shallow cardboard box and sprayed in light, even, sweeps out-of-doors. Let it set for an hour for most of the fumes to dissipate.


This is the backside of the pieces to show the difference.

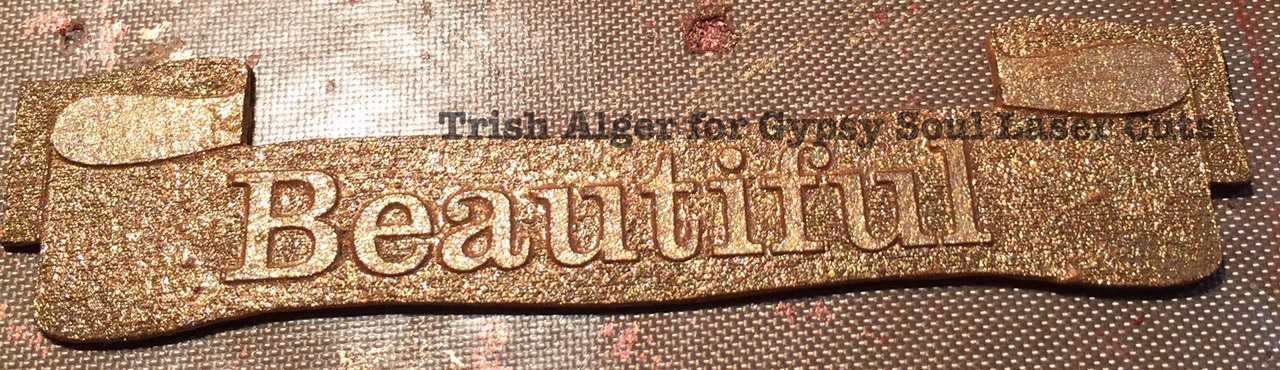
I wanted the filmstrip to stand out visually, so I mixed some gum Arabic, water, and PearlEx macro pearl.


I love the subtle shine it gives the filmstrip.


Here is the stage all striped out.


My black stripes were too intense for me so I toned them down with some PearlEx micro pearl.


Then the film reel and my mysterious dame needed a coat of black gesso.


The film reel received a coat of PearlEx silver.


The tone difference is amazing.


My mysterious dame needs a gun in her silhouette. I altered her handbag with my Exacto knife.


Love it.


I needed a cool film noir movie image for my screen and to set the dramatic theme. AlteredPages.com had a great one. I printed the image on white cardstock and adhered that to some chipboard for stability.


I added pop-dot adhesive to the back.


Here all of the parts, pre-assembly.


Notice the raven was given a coat of black gesso and then added to top edge of my stage. It rests just perfect up there.


Assembly time. I used tissue paper to prop up parts while they dry.


Love the look and negative space.


The filmstrip needed to be adhered with some elevation. Clear pop-dots, stacked up, performed well.


Almost there. Some dramatic placement.


Love how the negative space creates interest.


My mysterious dame needs a place.


A different angle. She creates another dramatic shadow.


Let's add a mirror to the top of the stage.


Here is the stage in many types of lighting and backdrops:

Outside...


Sideview, outside...


From above, outside...


Studio lighting...


Indoor natural lighting:


I wanted to show the amazing differences in each lighting situation. I can't wait to see how this scene looks each day at differing times. 

Thank you so much for being with me this month! It has been an amazing creative journey. Please let me know what you think, of what you have seen, and any crafty ideas you have come up with.
Ciao for now,
-Trish Alger
justchickenscratch.com


My supply list:

Gypsy Soul Laser Cuts Supplies  
-Stage  
-Hollywood Shape Set  
-Fashionistas 1930s  
-Raven from Steampunk 2 Shape Set  

Other Supplies;
Rust-Oleum
-Spray paints, aluminum and chrome
AlteredPages.com
-Film Noir digital image
-Mini mirror
-Aleene's Clear Tacky Glue
-Pop Dot Adhesives white and clear
Jacquard Products
-PearlEx Silver, Macro Pearl, Micro Pearl, Gum Arabic
Scotch
-ATG Adhesive
Liquitex
-Black Gesso
Eclectic Products
-E6000
White Cardstock
Scrap chipboard


Wednesday, February 17, 2016

Laying It Out, Family Style

When is the last time you created a layout? If recently, kudos to you. If like me you can't remember, let us consider it.

Scrapbooking was my entrée into this crafty medium. For the life of me I cannot figure out why I don't scrap anymore; at all. I don't even scrap digitally these days.

There was a discussion recently on Facebook about the dearth of scrapping supplies vs the overwhelming number of digital photos we all have. I can shoot 300 at one family event. How do I choose just one?


As a guest designer, for Gypsy Soul Laser Cuts, this month I challenged myself to a layout.

I remembered that I had a frame break in moving and had set aside the 8"x10" photo for later. Well, later is now here. I loved what this family picture said about us, the time period, and our personalities. Plus, the bright colors were just what I wanted to use.


I will walk you through the steps, the supply list is at the end.

I plan to place this on my wall so I chose a 12"x12" paper to start with.  Added some white gesso, then clear gesso before laying in some modeling paste and molding paste and crackle paste through some stencils. I even tried some black gesso for contrast.


Dye sprays in concentrated colors or iridescent tones were sprayed or splattered on the surface as well.


I kept trying materials until I achieved the look I was after. This is no time to be shy. Try it all if you like. That's why gesso is perfect for mixed media--it covers a multitude of attempts.


Inks were dripped and dropped in random order.


I wanted to add some matte effect with oil pastels.


Now to the great chipboard pieces I chose to incorporate. I used white gesso to prepare for other medium uses.


Here they are gessoed on the textured surface.


But wait, that's not all. The pieces need to pop with color.


Really pop. (Notice I cut apart the bottom piece).


The banner (that I modified a bit) and the pointer hand needed the golden touch.


It's getting there. I decided to use a gloss varnish over the brightly painted chipboard to make it shine and seal the surface.


When I tried the layout, the yellow was just too much for me and I was concerned I was trying to crowd too many pieces onto the layout with my large photo.


So I added back in some white, removed a couple of pieces and rearranged.


I liked it a lot better. Let me know what you think.

Here is a closer view of the edge:


The sticks were great to journal on top of.


Please let me know how your scrapbooking/layout/mixed media endeavors are going.  I'd love to hear from you.
Ciao for now,
-Trish Alger
justchickenscratch.com


Supply list:
Gypsy Soul Laser Cuts:  
Mixed Media Fragments 3  
Word Ribbons 1  
Curly Word: Remember  

Other Supplies:
Liquitex
-Black Gesso
-Clear Gesso
-Glossy Medium and Varnish
-Modeling Paste
Kaisercraft
-Hot Pink Paint
-Deep Yellow Paint
-Tropical Waters
Plaid
-Apple Barrel Paint Iris
Golden Paints
-Molding Paste
-Crackle Paste
Martha Stewart
-Gesso White
Scotch
-ATG
Eclectic Products
-E6000
Ranger Industries
-Dylusions Sprays
  Dirty Martini
  Fresh Lime
  White Linen
  Melted Chocolate
  Black Marble
Lindy's Stamp Gang
-Maidenhair Fern Green
Winsor and Newton
-Ink White
Faber Castell
-Gelatos Gold
AlteredPages.com
-Adhesive pop dots


Wednesday, February 10, 2016

Steampunk Dressform XL Tags in a Box

Hello there, this is Trish Alger. I'm so excited to be a Guest Designer this month for Gypsy Soul Laser Cuts.  Here is my steampunk inspired tags in a box project:


GSLCuts has the most amazing chipboard elements. Great themes, with intricate detail, that are a fabulous springboard for our creativity. 
I'm in love with GSLCuts steampunk selection. Gears, gears, and more gears. Delicate, lacy gear borders, chunky Gear shapes, and lovely Victorian pieces to pair with. 

I needed some feminine gifts. The kind that had laborious value, not cost. In the project I chose, each woman can receive her own extra-large tag (with sentiment) to take home. 

I set the challenge to create my own metal gears out of chipboard, rather than hunt through my metal stash. Other than a few metal brads, I succeeded. I kept my palette limited to brown tones, ivory, black, and rusty gear metallics. 

Let's look through the steps of the tutorial.  You'll find the supply list at the end.


I chose Tags in a Box Display for my project.


Each piece was gessoed in black...


Or white...


Or a coat of iridescent medium mixed with acrylic medium...


Here are the wings closer...


(Do yourself a favor and remove any lingering bits from the holes before covering it in medium.)


Some unbleached titanium for the dressforms...


Next I added some rust paint over the vanilla doily edges and cut to fit in the shape of a corset.


And some copper for the beautiful banner...


Then a bit of unbleached titanium over the letters...


A closer view...


Time to mix paint with acrylic medium and add some color...


Mixtures...


Black gessoed tag, painted in a leather color...


White gessoed tag, painted in another leather tone...


I printed the Pocket Pages sentiments onto the vanilla linen paper and trimmed to allow six for the backs of the tags in the box. They were adhered with the acrylic medium.


The inside of the box were gessoed black. The outside was painted with copper and the corset images (printed on vanilla linen paper) were adhered with acrylic medium. Doily edges were deconstructed to adhere with acrylic medium around the edges like a frame.


The gear sheet, painted with rust, copper, and black...


A second view...


And a third view...


Here are the individual tags completed:


Tag 1...


Tag 2...


Tag 3...


Tag 4...


Tag 5...


Tag 6...


And the tag for the front of the box...


Here is the entire box filled with the completed tags:


I realized as I assembled the completed sides for box that I needed to be extra aware of the materials in the tab areas. That includes paper, paint, and mediums. Lots of sanding otherwise.


Well, I had a lot of fun and it made me happy. What happiness are you creating today? Please let us know you were here and what you thought of my box of tags.

Ciao for now,

-Trish Alger
justchickenscratch.com


My ingredient list:

GSLCuts:
Gears Border and Corners (Special Order)

Other Supplies:
Liquitex 
-Black Gesso
-Basic Burnt Sienna
-Gloss Acrylic Medium and Varnish
-Heavy Body Acrylic Unbleached Titanium 
Golden Paints
-Fluid Acrylic Burnt Sienna
-Glaze Metallic Copper Light
Martha Stewart
-Metallic Acrylic Rust, Gloss Black, and Copper
-White Gesso
AlteredPages.com
-Victorian Edges Rubber Stamp
-Steampunk and Pocket Pages digital images
Eclectic Products
-E6000
Stewart Superior
-Palette Hybrid Inkpad Burnt Sienna
Stampin' Up
-Waffle Paper Brown
Winsor & Newton
-Iridescent Medium 
Vanilla linen paper 
Historical images free of copywrite
Assorted Ephemera